Hello, Happy Friday!!!
I'm writing to you today from a brand new desk that I built last weekend!

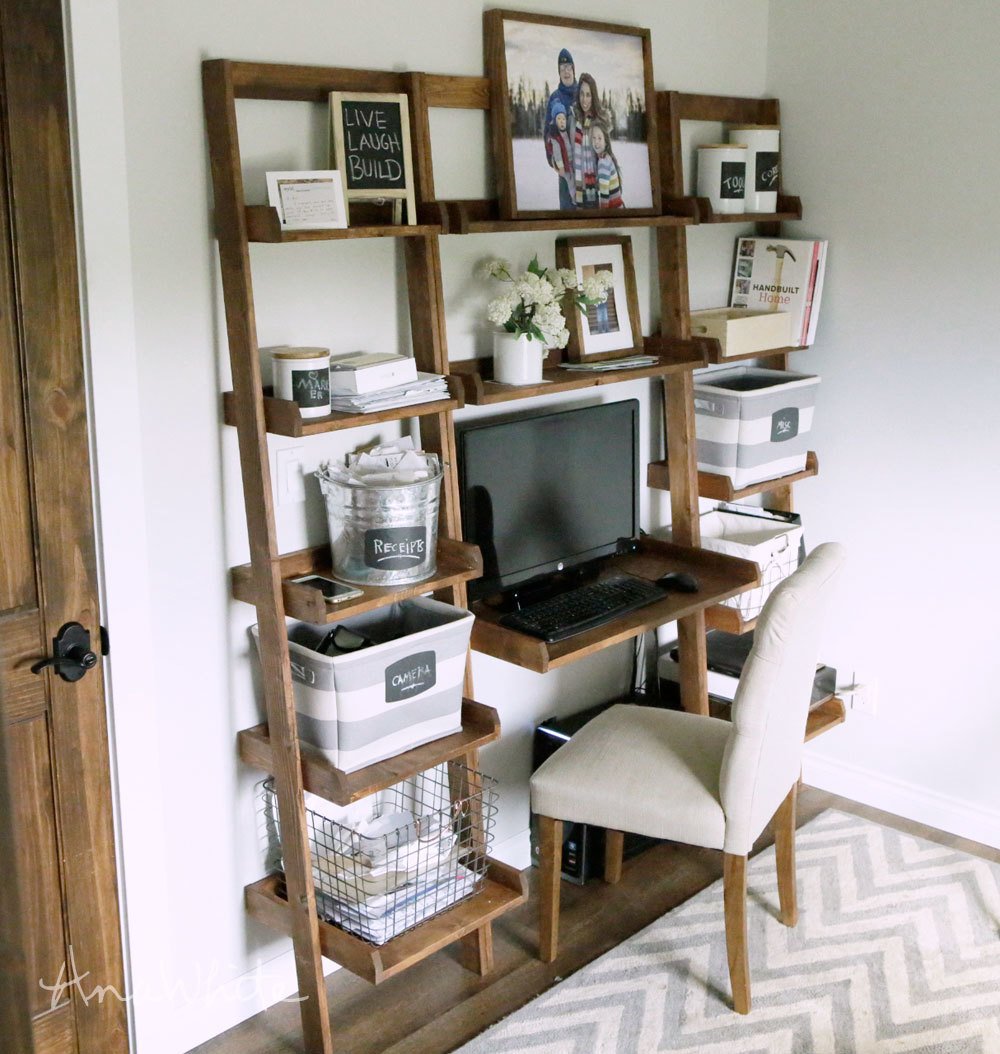
I live in a small space, without the luxury of having a dedicated office. So I needed a desk that would maximize storage and functionality, in the smallest possible footprint.
This desk does it.
I've been using it for about a week now, and can't even express how much I love it!!! The desk area is just big enough for my monitor, keyboard and mouse - no clutter can accummulate there! And will all the diffrent sized shelves at different heights, I can keep all my stuff organized and within easy reach. On the lower larger shelves, I keep my recycling basket and printer, the next level of shelves is baskets to hide all my electronics and cords and a few books. Moving up, I keep more books, a receipt collection bucket. On the shelves just above the moniter the mail, pencils and office accessories end up - it's too high for the baby to get into and too narrow to clutter with other stuff. The top shelf is pretty much decor and seldom used items.
I built this desk on Saturday, working here and there, as much as I could with kids and no babysitter. It took me a few hours to build and stain and clear coat. Then on Sunday I assembled the desk and brought into the house. That took another couple of hours. So about five hours total - not bad!
The reason this was such a quick and easy build is all of the shelves are just 1x boards. The top shelf is 1x6, the next shelf is 1x8, then 1x10, 1x12 and the bottom shelf is two 1x8s. I didn't have to rip plywood or edge band or anything like that - just cross cut and go!
I put together a video that shows all the steps here -
And here's the steps for those of you who can't watch video -
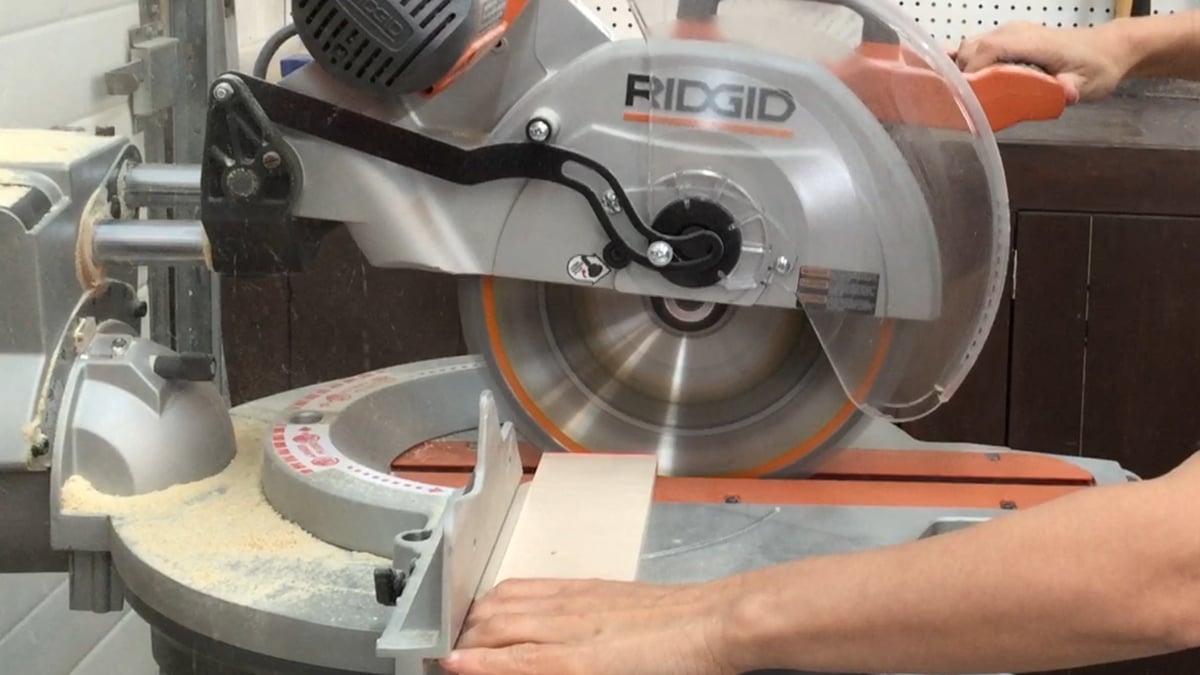
I cut all of my boards with a compound miter saw. For all of the shelves and the back, the length was the same. So what I did was set a stop block on my saw for all the cuts of the same length. Then I can just set my board on the saw, with one end butted up to the stop block and cut away. There were alot of cuts, so this made things go much faster.
Also, after I cut all of the shelf sides, I then just set my saw to a 22-1/2 degree angle (I picked this angle because it is a set point on my saw, but you could use any angle) and nipped off one corner of all of the shelf side trim pieces. I didn't even measure, just made a pencil mark on my saw of where the end of the board needed to sit, and then just cut. This softened up the corners of the project and added a nice design element.
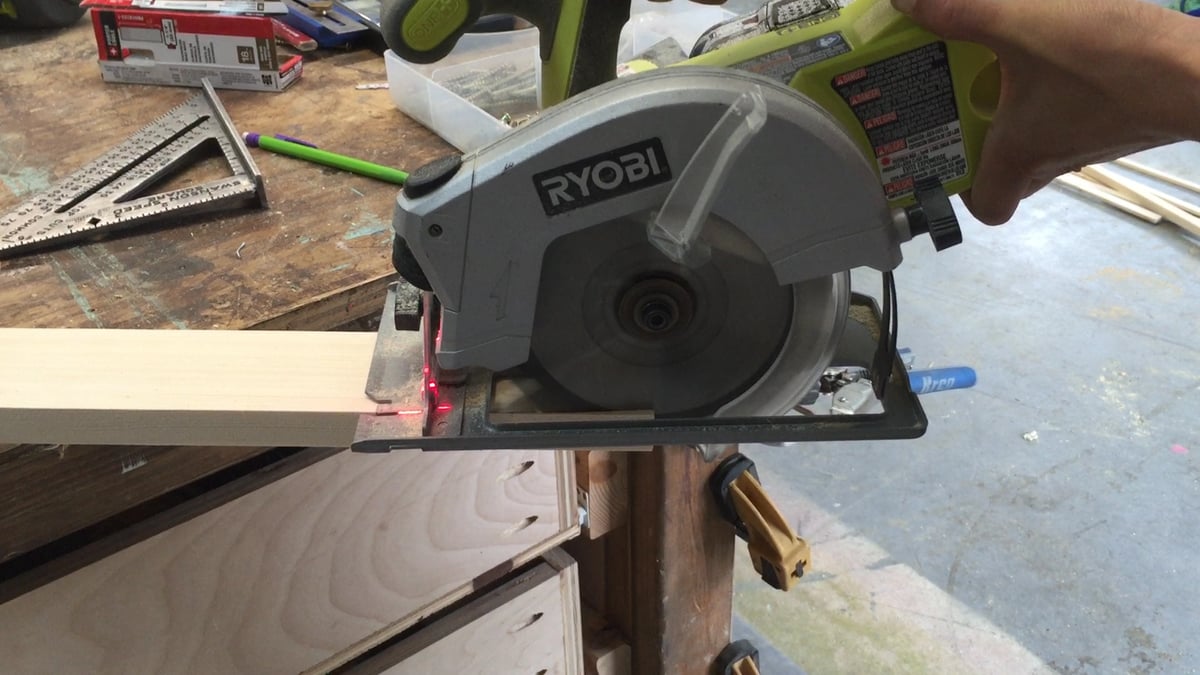
The legs are cut at a 5 degree angle at the top and bottom. But this won't sit flush with the wall. So I took a speed square and marked square to the top 5 degree angle and cut off the backs with a circular saw so there is a 2-1/2" area on the backs of the legs that is square to the wall. Watch the video - this all is explained and shown in it.
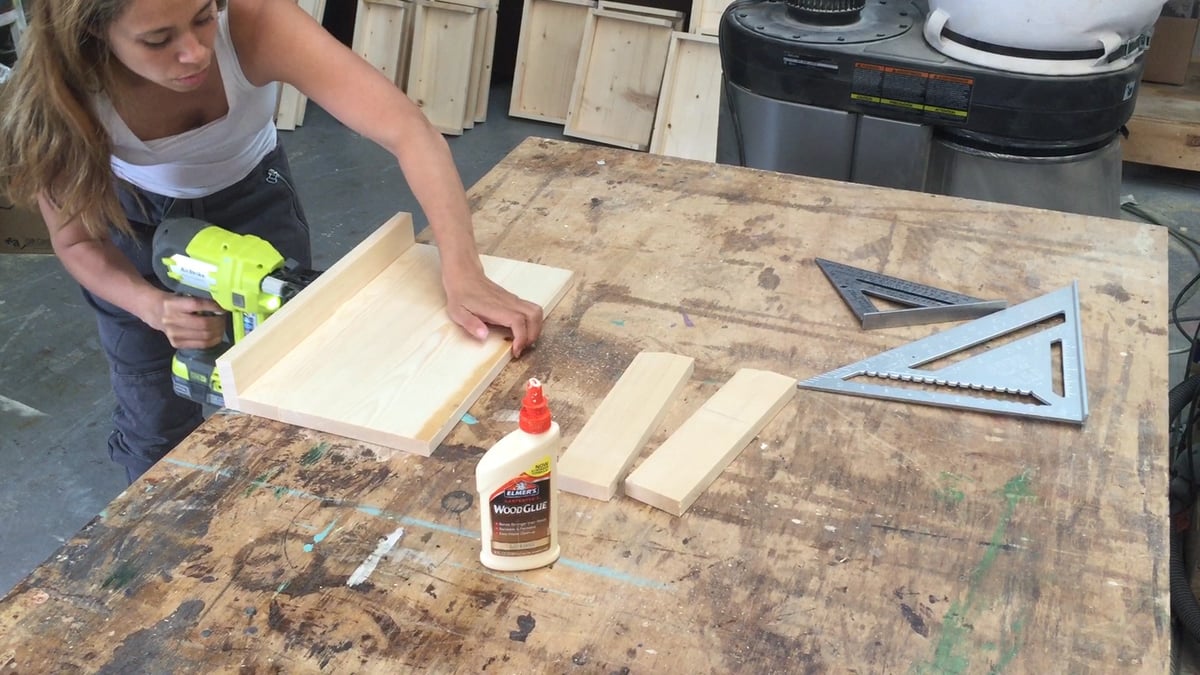
Then I just went to work building shelves. I nailed my sides and ends on - you must use glue when nailing. The nails will not hold out without.
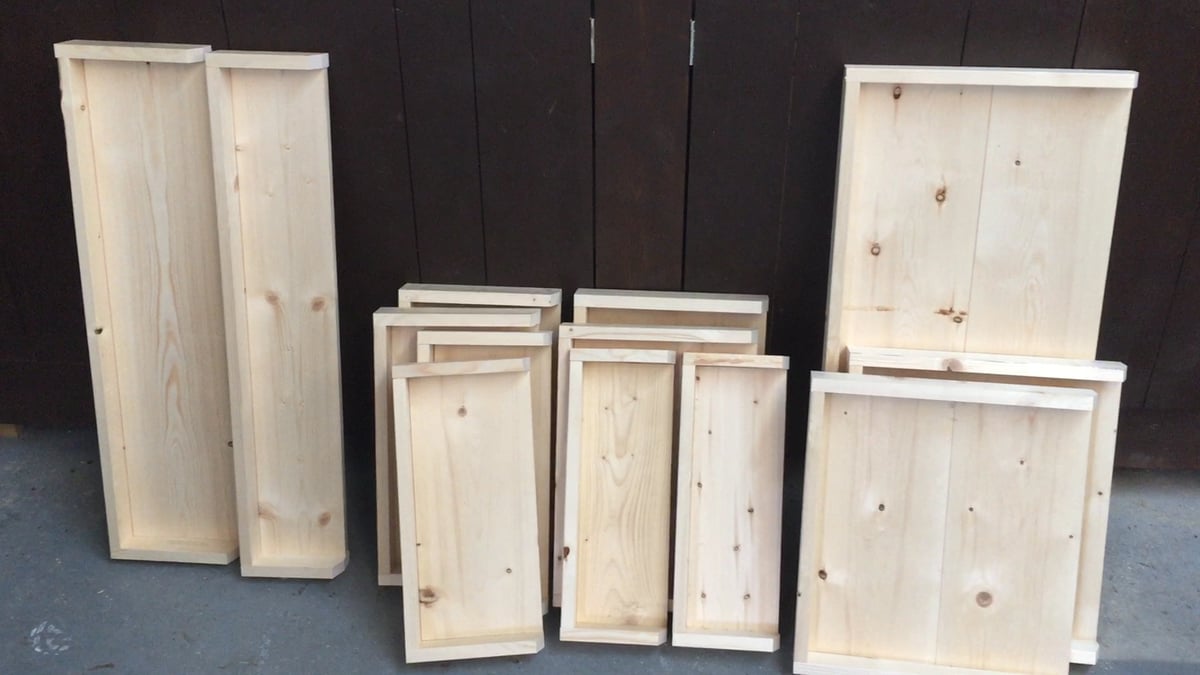
Here's all my shelves built. The wider width shelves are two 1x8s, I did pocket hole them together on the bottom just for security.
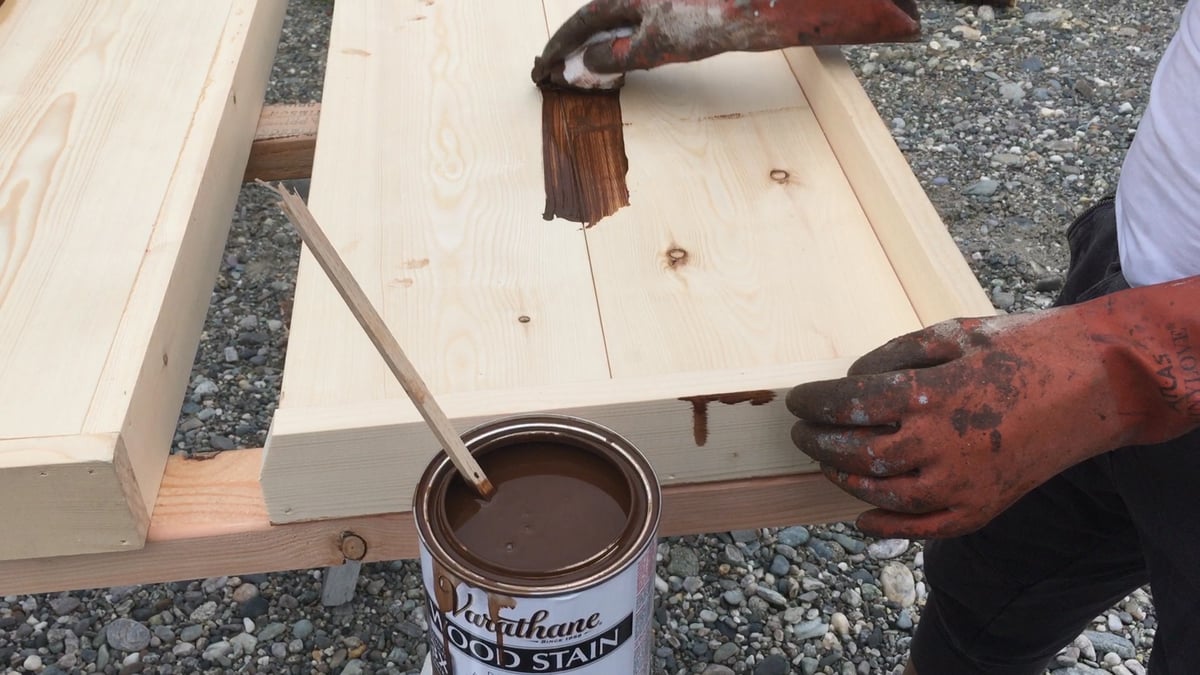
I stained all of the pieces with Varathane Early American, wiping on with a paper towel.
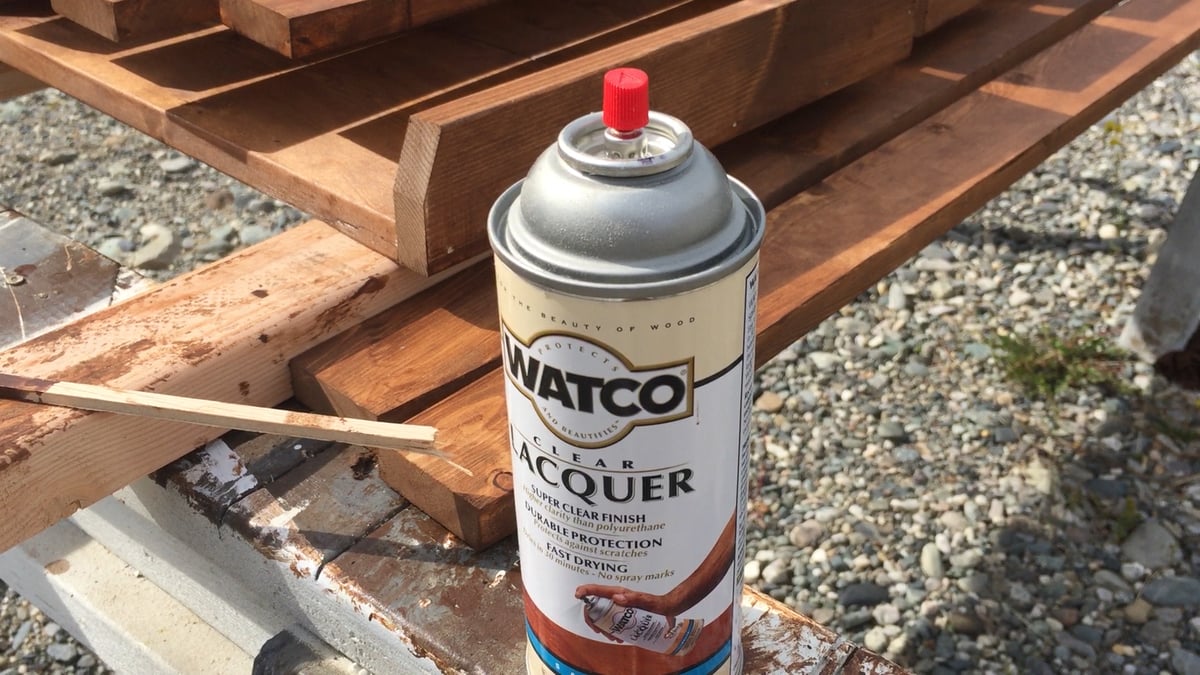
Then I sprayed on Watco Lacquer to protect the stained finish.
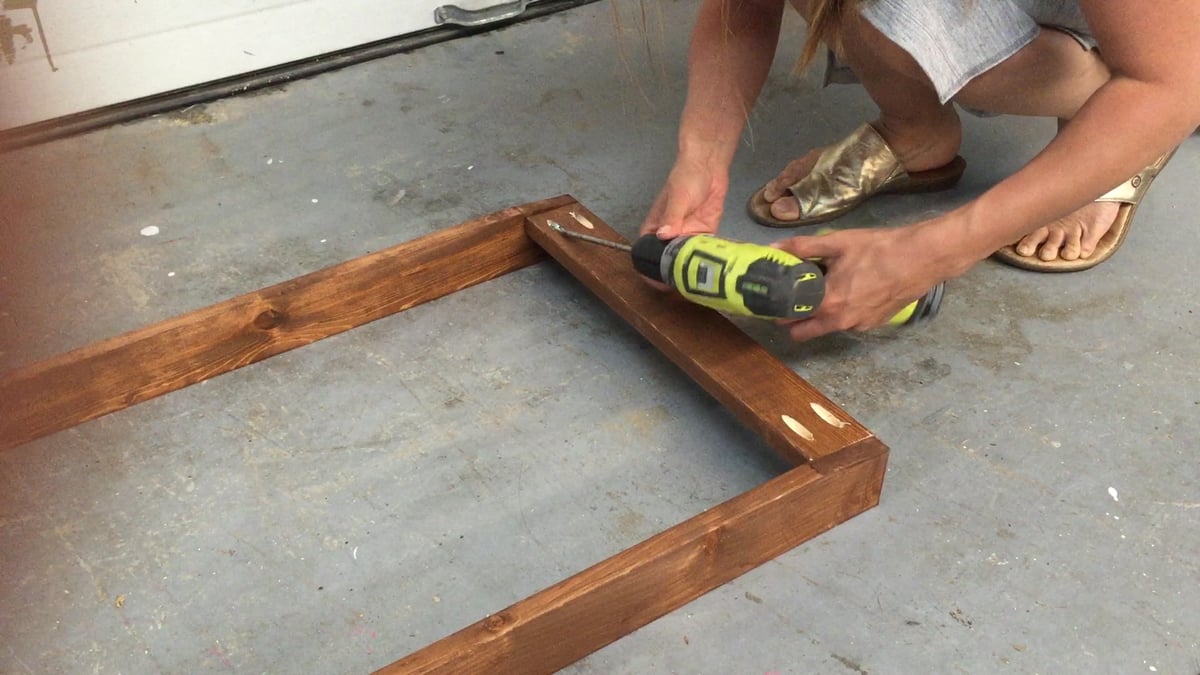
Now time to assemble! First thing I did was attach the backs to the legs.
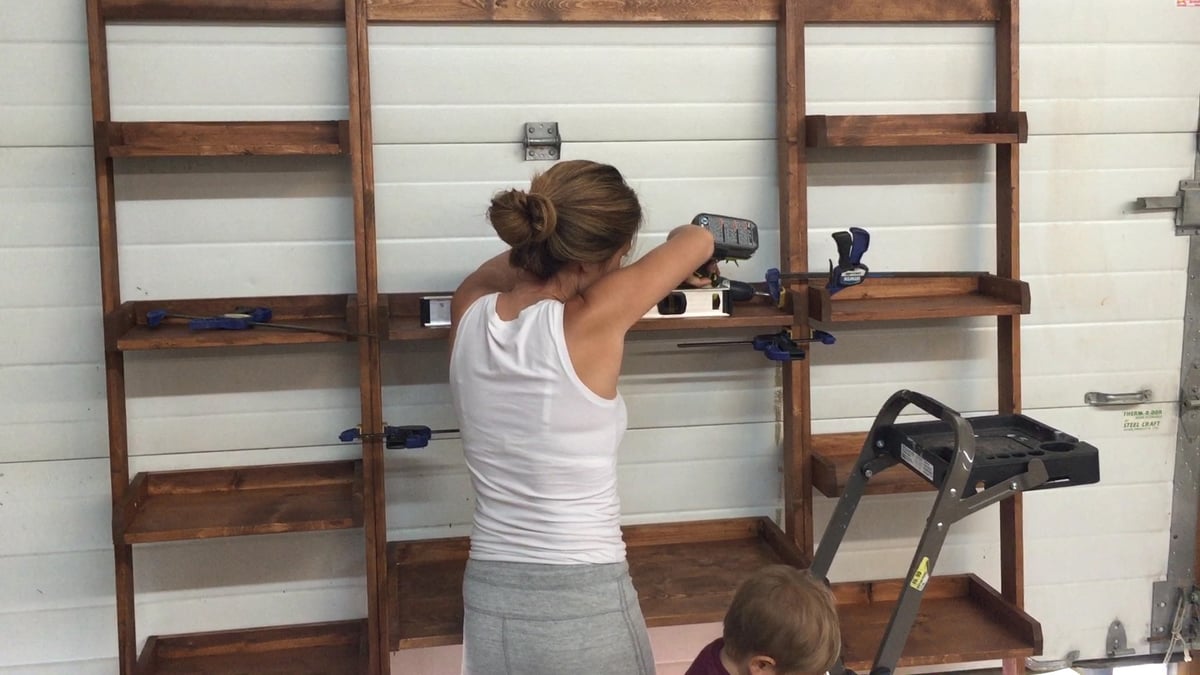
And then leaned the legs with the backs up against a wall and clamped the shelves in the right positions and screwed them on.
And that's it - new desk system in a weekend!
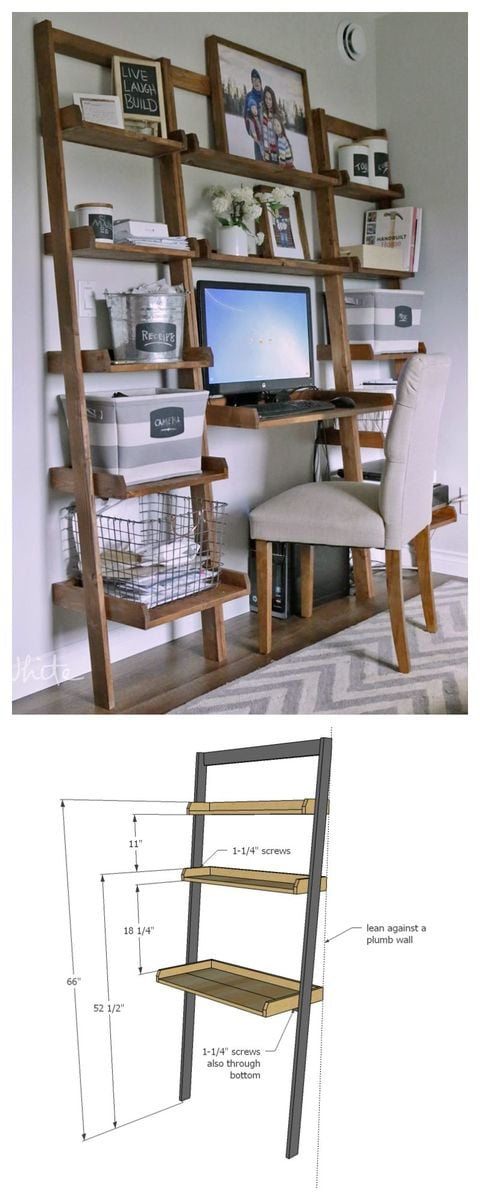
The plans for this desk follow (if this is the homepage, click READ MORE below), and you can find the leaning ladder bookshelf plans here!
Have a great weekend,
XO Ana